The eerie, whimsical, and utterly iconic world of Tim Burton’s “The Nightmare Before Christmas” has captured hearts for decades. Its blend of gothic aesthetics and heartwarming themes makes it a perfect muse for creative endeavors. For fans looking to inject a touch of Halloween Town into their everyday style, crafting DIY bracelet charms inspired by this cinematic masterpiece offers a uniquely personal and expressive outlet. This guide delves into the exciting realm of creating your own “Nightmare Before Christmas” bracelet charms, providing inspiration, practical tips, and creative pathways for enthusiasts of all skill levels.
Unleashing Your Inner Macabre Artist: Why DIY Charms?

The appeal of DIY bracelet charms, especially those themed around “The Nightmare Before Christmas,” lies in several compelling factors:
- Personalization: Store-bought charms, while lovely, can often feel generic. DIY allows you to curate a collection that perfectly reflects your favorite characters, moments, and moods from the film.
- Cost-Effectiveness: Creating your own charms can be significantly more budget-friendly than purchasing officially licensed or high-end artisanal pieces.
- Creative Fulfillment: The act of designing and crafting something with your own hands is inherently rewarding. It’s a tangible expression of your passion.
- Unique Gift Potential: Handcrafted charms make incredibly thoughtful and personalized gifts for fellow “Nightmare Before Christmas” aficionados.
- Therapeutic Outlet: The focus and detail required in crafting can be a wonderful form of stress relief and mindfulness.
According to a recent survey by the Craft Industry Association, the DIY and craft market in the United States is valued at over $45 billion, highlighting a significant and growing interest in handmade creations. This indicates a strong consumer desire for unique, personalized items.
Character Spotlight: Iconic Designs to Inspire Your Creations
The rich tapestry of characters in “The Nightmare Before Christmas” provides an endless wellspring of design ideas. Here are some fan-favorite characters and elements that translate beautifully into charm form:
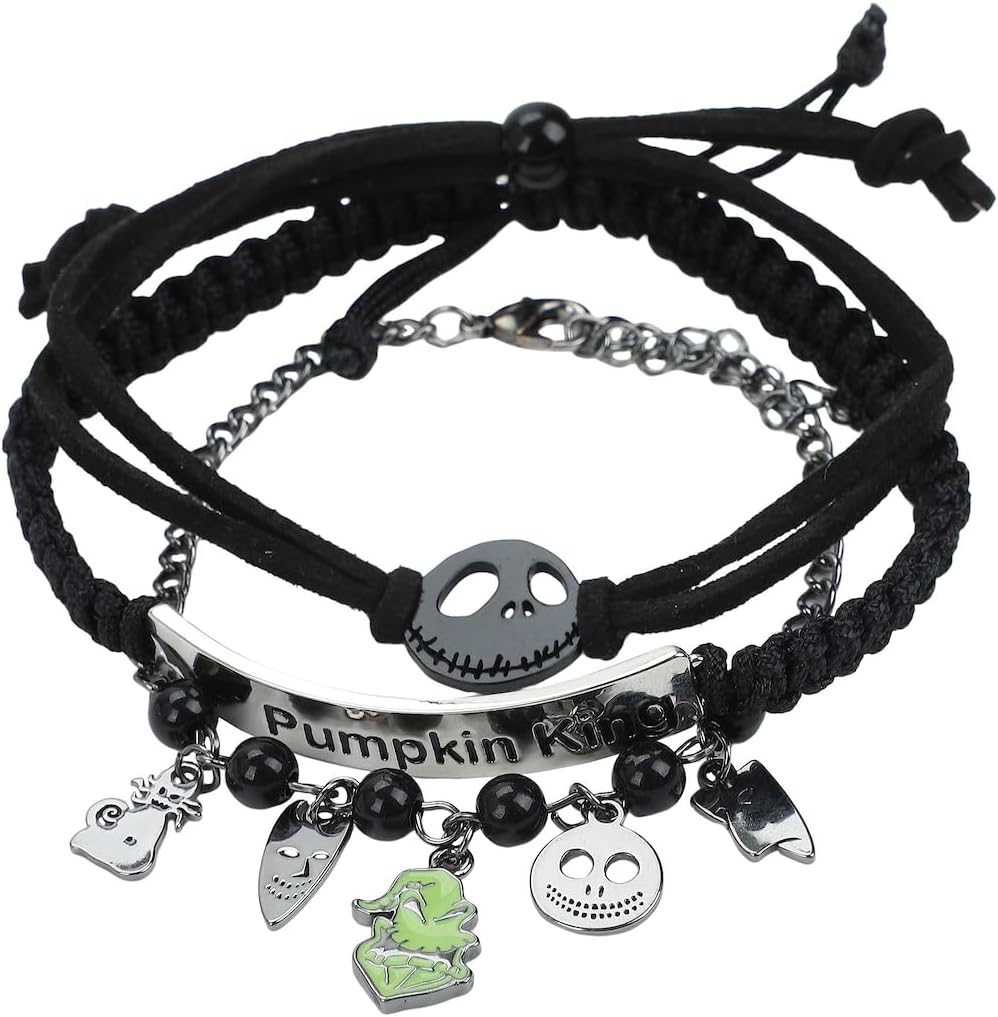
Jack Skellington: The Pumpkin King

Jack’s distinctive black and white striped suit, his skeletal grin, and his round, expressive eyes are instantly recognizable. Charms can capture:
- A miniature Jack Skellington head with his wide smile.
- A charm resembling his iconic pinstripe suit.
- A bat wing motif, symbolizing his transformation and love for Halloween.
- His ghost-like form, perhaps with translucent elements.
For a case study in popular DIY trends, consider the surge in polymer clay character creations seen on platforms like Etsy. Many artists specialize in detailed miniature figures, demonstrating the demand for meticulously crafted character-inspired items.
Sally: The Ragdoll of Mystery

Sally’s patchwork dress, her stitches, and her gentle, melancholic demeanor offer a different aesthetic. Charm ideas for Sally include:
- A charm featuring her patchwork pattern.
- A simple stitch design, representing her mended nature.
- A miniature sewing needle and thread motif.
- A subtle silhouette of her with her fiery red hair.
Oogie Boogie: The Sack of Spiders
Oogie Boogie’s menacing presence and his love for gambling make him a compelling character for charms. Consider:
- A miniature burlap-textured charm with his wide, toothy grin.
- A dice motif, hinting at his gambling obsession.
- A creepy-crawly spider charm to represent his inhabitants.
- A stylized silhouette of his menacing figure.
Other Memorable Elements: Beyond the Main Cast
The magic of “The Nightmare Before Christmas” extends beyond its central characters. Don’t forget these enchanting motifs:
- Zero: Jack’s loyal ghost dog, with his pumpkin nose.
- The Spiral Hill: The iconic landmark of Halloween Town.
- Bat and Spider Motifs: Recurring symbols of the film’s atmosphere.
- Christmas Elements (with a twist): Twisted candy canes, present boxes with skulls, or a mournful gingerbread man.
- Lock, Shock, and Barrel: The mischievous trick-or-treaters.
Materials and Techniques: Your Toolkit for Macabre Crafting
The beauty of DIY charm making lies in its accessibility. You don’t need a professional studio to create stunning pieces. Here are some popular materials and techniques:
Polymer Clay: The Versatile Sculptor
Polymer clay is a favorite among crafters for its pliability, durability after baking, and vibrant color options. It’s ideal for creating detailed miniatures.
- Basic Techniques: Rolling, shaping, sculpting, and imprinting textures.
- Color Mixing: Achieve Jack’s black and white, Sally’s muted tones, or Oogie Boogie’s earthy hues.
- Baking: Follow manufacturer instructions carefully for proper curing.
- Finishing: Sanding, polishing, and sealing with a clear varnish can enhance the look.
Statistics from craft supply retailers show a consistent increase in polymer clay sales year-over-year, particularly among young adult crafters interested in jewelry making.
Resin Casting: Capturing Depth and Detail
Resin allows for the creation of transparent, glossy, and multi-layered charms. It’s perfect for encapsulating small objects or creating layered effects.
- Molds: Silicone molds in various shapes and sizes are readily available.
- Inclusions: Glitter, small trinkets, dried flowers, or even tiny printed images can be embedded.
- Coloring: Resin dyes can create opaque or translucent colored effects.
- Safety Precautions: Always work in a well-ventilated area and wear gloves and a respirator.
Beads and Findings: The Essential Embellishments
Beyond the sculpted elements, beads and findings are crucial for transforming your creations into functional charms.
- Charm Bases: Lobster clasps, jump rings, or pre-made charm loops.
- Accent Beads: Black, white, purple, or green beads can complement your designs.
- Wire Wrapping: For a more intricate look, wire wrapping can add elegance to beads and small sculpted elements.
- Eye Pins: Essential for attaching charms to chains or other components.
Metal Stamping: Adding a Personal Touch
For a more industrial or subtle touch, metal stamping allows you to imprint letters, numbers, or simple symbols onto metal blanks.
- Materials: Metal blanks (brass, aluminum, copper) and metal stamps.
- Tools: A steel stamping block and a metal stamping hammer.
- Applications: Stamp character names, iconic quotes (“What’s this?”), or symbolic dates.
Step-by-Step Charm Creation: A Practical Walkthrough (Polymer Clay Example)

Let’s walk through creating a simple Jack Skellington head charm using polymer clay. This example can be adapted for other characters and materials.
Step 1: Gather Your Supplies
- Black and white polymer clay
- Sculpting tools (toothpicks, needles, craft knives)
- Rolling pin or brayer
- Oven for baking
- Clear sealant or varnish
- Jump ring or eye pin
- Pliers
Step 2: Sculpt the Head
Roll a ball of black polymer clay for the head. Flatten one side slightly for the face. Use a toothpick or needle to etch the basic outline of Jack’s eye sockets and mouth.
Step 3: Add the Features
Roll small balls of white clay for the eyes and teeth. Carefully attach them to the face, pressing gently to blend the edges. Use a needle tool to define the pupils of the eyes and the individual teeth. Sculpt the iconic smile by carefully shaping and attaching a curved piece of white clay.
Step 4: The Stripes
Roll thin black clay snakes and carefully adhere them to the “hat” area of Jack’s head to create his signature stripes. You can also extend these slightly down the “face” for a stylized effect.
Step 5: Baking
Place the charm on a baking sheet lined with parchment paper. Bake according to the polymer clay manufacturer’s instructions. Ensure even baking for durability.
Step 6: Finishing Touches
Once cooled, you can gently sand any rough edges. Apply a thin coat of clear sealant or varnish for protection and a glossy finish. Carefully attach a jump ring or eye pin through the top of the charm using pliers.
Beyond the Basics: Advanced Techniques and Creative Flourishes
Once you’ve mastered the fundamentals, consider these advanced techniques to elevate your “Nightmare Before Christmas” charm collection:
- Adding Texture: Use fabric scraps, netting, or even real lace to imprint unique textures onto your clay charms.
- Layering and Dimension: Build up elements in layers to create depth and a more realistic or stylized look.
- Weathering and Aging Effects: For characters like Oogie Boogie, use chalk pastels or acrylic paints to create a dusty, aged, or gritty appearance.
- Glow-in-the-Dark Elements: Incorporate glow-in-the-dark pigments into your clay or resin for an eerie luminescence.
- Miniature Dioramas: For the truly ambitious, consider creating tiny scenes within a larger charm, like Lock, Shock, and Barrel in their barrel.
Online tutorials and video demonstrations on platforms like YouTube offer invaluable visual guides for these advanced techniques, with millions of views demonstrating their popularity.
Troubleshooting Common DIY Charm Challenges
Even the most experienced crafters encounter challenges. Here are a few common issues and how to address them:
- Clay Cracking: Ensure the clay is conditioned properly before sculpting, and avoid overly thin or delicate sections.
- Resin Not Curing: Check the resin-to-hardener ratio, ensure thorough mixing, and verify that the ambient temperature is within the recommended range.
- Adhesion Issues: For polymer clay, ensure surfaces are clean and gently press pieces together. For resin, ensure inclusions are dry and free of oils.
- Jump Rings Pulling Out: Reinforce the attachment point by embedding an eye pin deeply into the clay or resin before it cures, or by using a stronger adhesive if attaching to a pre-made base.
The DIY community often shares solutions and advice on forums and social media groups, making it a valuable resource for troubleshooting.
Wear Your Halloween Town Pride
“The Nightmare Before Christmas” offers a unique aesthetic that resonates deeply with many. Creating DIY bracelet charms inspired by this beloved film is a rewarding journey that allows for boundless creativity, personalization, and a tangible connection to the magic of Halloween Town. From the simple elegance of Jack’s stripes to the intricate details of Sally’s stitches, the possibilities are as vast as Tim Burton’s imagination. By exploring different materials, techniques, and drawing inspiration from the film’s iconic characters and motifs, you can curate a truly spectacular and personalized bracelet that proudly showcases your love for “The Nightmare Before Christmas.” So, gather your supplies, unleash your inner macabre artist, and begin crafting your own wearable wonders from the heart of Halloween Town.